


In 6 steps :
Restoring a vintage racing bike
Do you love vintage racing bikes? Are you a bit eco-conscious and don't want to buy a new bike? Do people say you’re "tight with money"?
But most importantly, you don’t want to invest in a fancy bike that, like many nice bikes in the city, will likely get STOLEN.
Then we have the solution for you: restore an old 80s racing bike to turn it into a little speed machine.
Sure, it’ll be a tad heavier than a brand-new bike owned by a 30-something triathlete, but it’ll ride well... and most importantly, you’ll be much less likely to have it stolen.
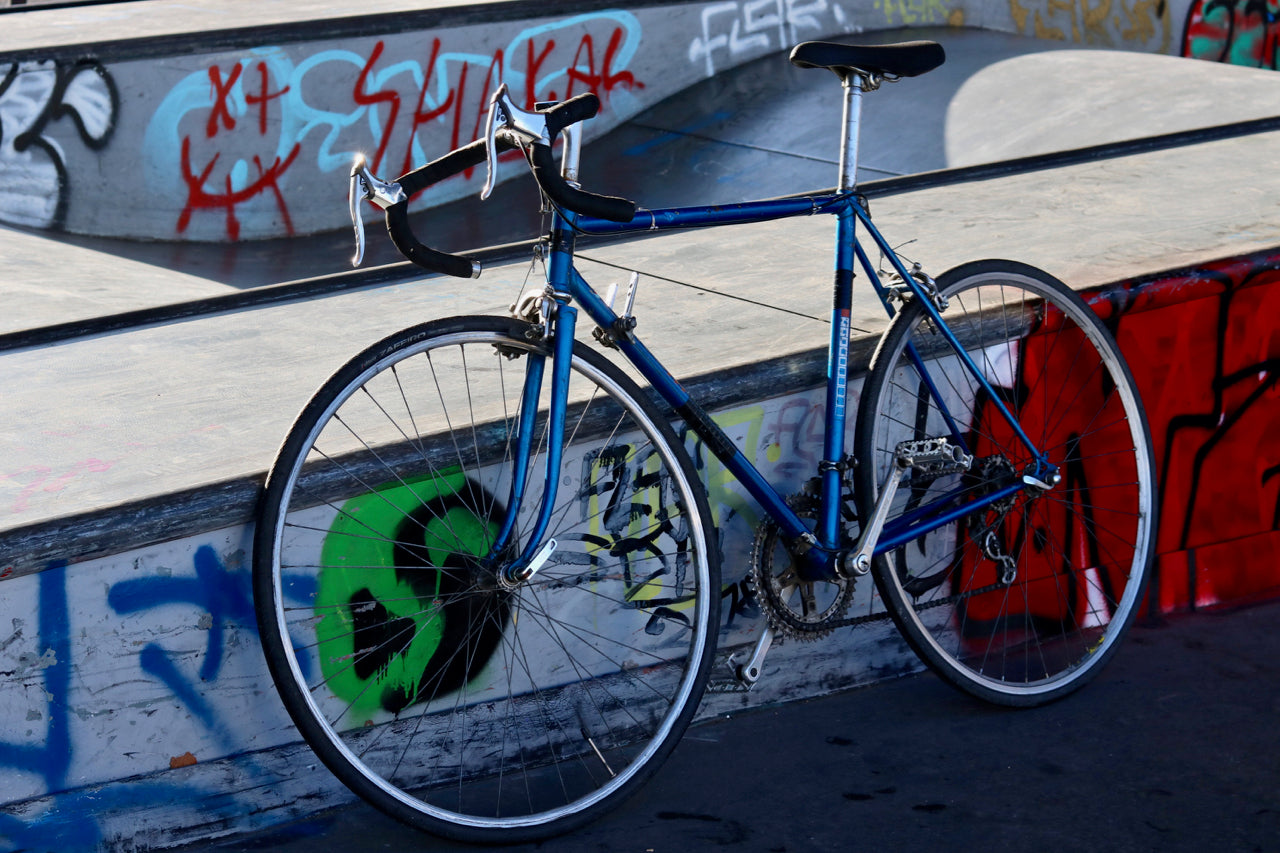
Step 1: Buying a racing bike on the internet
Personally, I set my sights on a small Gitane bike for 70€, size 54, worn by life, but just needing a little love to reveal its full potential.
Regarding the size, note that 54 is versatile enough for anyone between 1m68 and 1m85.
Find below a chart explaining how to choose the frame height (from the center of the bottom bracket to the bottom of the seat) of a road bike:
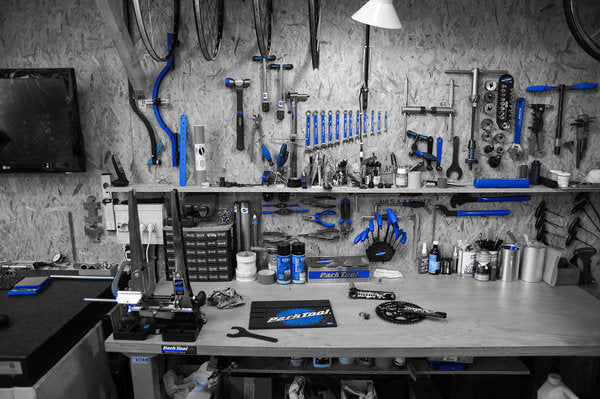
Step 2: Find the nearest repair shop
Three reasons to join a local repair workshop:
- for every repair, the golden rule if you don’t want to pull your hair out is: one repair = one toolset
- you'll find many spare parts that are impossible to find in stores
- best of all, membership usually costs only around €20 per year.
For Parisians, I recommend Solicycle.

Step 3: Change the rim tape and tires to avoid flat tires
To check if a flat tire is due to a worn rim tape, simply check if the puncture is on the underside of the inner tube. If it is, there's no doubt the rim tape is the culprit!
To fix it:
- deflate the inner tube and remove the tire
- check if the rim tape has holes (if so, it's guaranteed to cause a flat)
- if it's damaged, remove the rim tape.
- clean the rim with a dry cloth
- carefully wrap the new rim tape flat, starting from the valve hole
When to change your bike tire?
- every 2000 to 5000 km
- no groove depth on the top
- cracked on the sides
- torn / slashed
Note
Tire maintenance
- Every 2000 to 5000 km
- No tread depth on the top
- Cracked on the sides
- Holes/tears


Step 4: Change the brake cables and sheaths, the brake pads and apply the brakes
-

1.
Remove the handlebar tape (the front and rear brake cables are supposed to run underneath).
-

2.
Unscrew the bolt that "pinches" the cable with a flat wrench and cut the end of the cable.
-

3.
Engage the brakes to "open" them at the front, use an Allen key to unscrew the brake handles (easier to do if the brakes are disassembled but it's not mandatory).
-

4.
- Push the cable out of the brake handles and pull it all the way through
- Thread a new cable through the brake handles (remember to grease it)
- Make sure to cut the housing properly (it needs to go all the way along, passing under the handlebar tape)
-

Well done!
(But it's not over yet)


-

Perpendicular axis
An equivalent to my front brake. The pad's screw axis is perpendicular to the rims.
-

Parallel axis
The axis of the brake pad screw is parallel to the rims.
-

Apply and adjust a center pull brake
Final step: adjust the cable tension on the small part that locks the cable for a center-pull brake.
-

Column
The best tool for this is using a Y-tube wrench along with a flat wrench, and adjusting the tension with the cable detached. Check if it's tight enough, then repeat if necessary.


Step 5: Change the cables and derailleur hoses
The cables on a road bike typically pass through this type of shifter. They are easily removed by loosening the clamp bolt at the derailleur (front/rear) and then pulling the cable out through the end of the shifter.
See the photo on the right.
--
How to adjust the front/rear derailleur on a vintage road bike?
As with all derailleurs, the task is to adjust the high stop and low stop. On mine, there are two stop screws:
- One screw corresponds to the stop when the cable is tight: the derailleur won’t go any higher
- One screw corresponds to the stop when the cable is loose: the derailleur won’t go any lower
I’ll spare you the diagrams, but the general principle is this: tighten the cable fully and adjust the high stop, loosen the cable fully and adjust the low stop. By playing a little with the screws, you can immediately see if the derailleur moves up or down.
- When the cable is tight, you want the chain to be on the large chainring. If not, give the screw a slight turn to allow the derailleur to move up a little higher
- When the cable is loose, you want the chain to be on the small chainring. If not, give the screw a slight turn to allow the derailleur to move down a bit more
-

Tense
-

Relaxed
-

Do you have it?


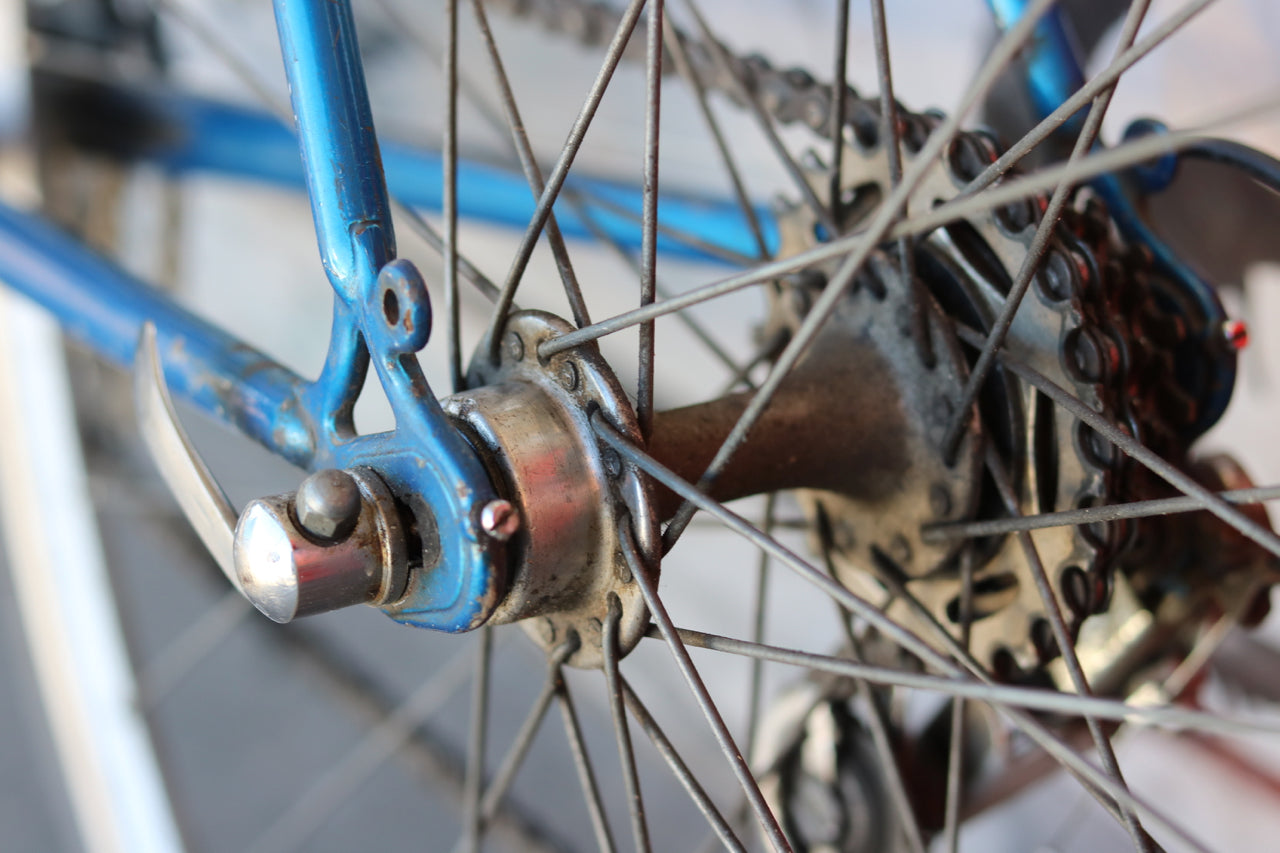
Step 6: Grease the rear hub
Not the easiest operation to perform, but at least you'll be sure your bike will run perfectly after that! But before anything else, you need to understand how a rear bicycle hub works:
- the hub is the moving part of the wheel where the spokes are attached (no need to remove the spokes for maintenance).
-

Anatomy of a bike
Not the easiest operation to perform, but at least you'll be sure your bike will run perfectly after that! But before anything else, you need to understand how a rear bicycle hub works.
--
Above: Diagram of a hub (note the order and side of the nuts/bolts).
-

The hub
The movable part of the wheel to which the spokes are attached (which don't need to be removed for maintenance).
-

The axis
The part of the wheel fixed to the frame, around which the hub rotates (via ball bearings). It's nothing more than a large bolt that can be either solid (tightened by bolt) or hollow (quick-release tightening). Be sure to measure your axle correctly, as you’ll need one with the same (or nearly the same) dimensions.


-

Last straight line!
The steps to disassemble a vintage road bike's rear hub:
-

1.
- Remove the rear wheel
- Remove the rear cassette using a chain whip and a cassette lockring tool
-

2.
- Unscrew the locknut using two flat wrenches
- Make sure to note which side the parts go on
- Check that the axle is straight
-

3.
- Remove the caps to access the bearings (using a flathead screwdriver)
- Delicate operation: remove the bearings and count them
- Replace with a bearing cage containing the same number of bearings
-

4.
- Grease generously
- Replace the caps using a soft hammer
- Reassemble everything
-

Tadam 🎉
Your ride is ready for the road!


Want to discover our latest articles ...
View all-

New iPhone 17 and Shapeheart: the perfect combi...
The iPhone 17 is here, and to get the most out of it, there's nothing better than Shapeheart magnetic mounts. Compatible with all uses (motorcycle, bicycle, running, car), our accessories...
New iPhone 17 and Shapeheart: the perfect combi...
The iPhone 17 is here, and to get the most out of it, there's nothing better than Shapeheart magnetic mounts. Compatible with all uses (motorcycle, bicycle, running, car), our accessories...
-

Top 3 Motorcycle Road Trips to Take in Europe
Looking for freedom and adventure? Europe is full of spectacular roads to explore by motorcycle. Mountains, seaside, or wild landscapes: there's something for everyone. Discover the 3 most beautiful motorcycle...
Top 3 Motorcycle Road Trips to Take in Europe
Looking for freedom and adventure? Europe is full of spectacular roads to explore by motorcycle. Mountains, seaside, or wild landscapes: there's something for everyone. Discover the 3 most beautiful motorcycle...
-

Sportbikes: Speed, Technology and Precision
Sharp design, roaring engine, engaged riding position... Sports bikes fascinate as much as they impress. True concentrations of technology and precision, they are built for performance. But whether you ride...
Sportbikes: Speed, Technology and Precision
Sharp design, roaring engine, engaged riding position... Sports bikes fascinate as much as they impress. True concentrations of technology and precision, they are built for performance. But whether you ride...


